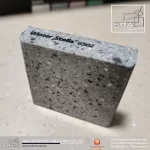
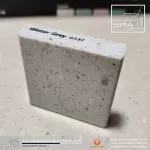
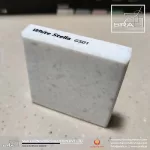
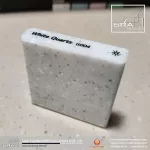
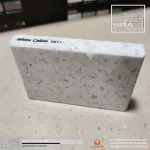
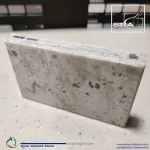
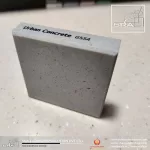
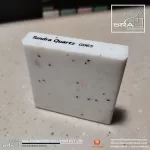
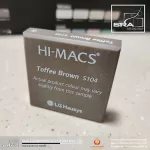
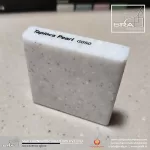
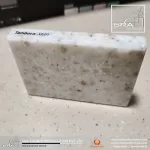
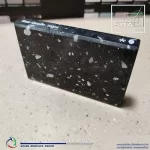
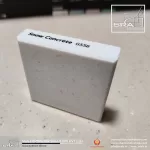
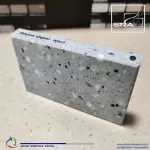
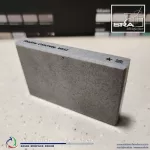
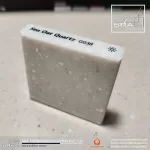
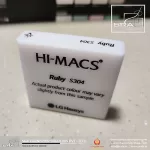
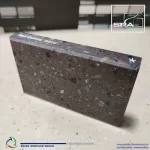
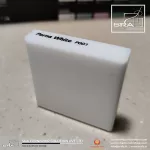
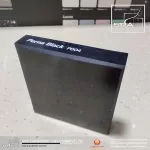
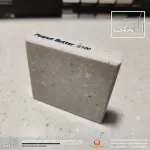
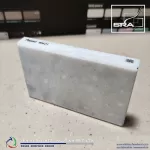
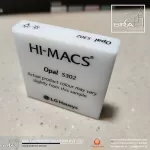
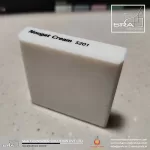
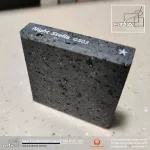
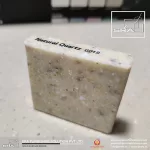
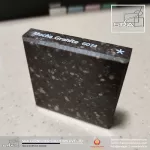
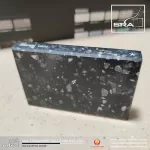
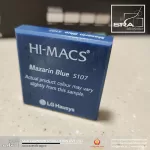
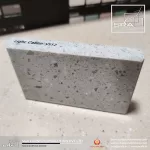
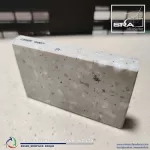
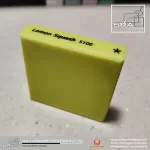
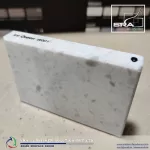
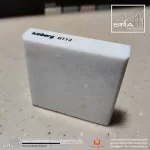
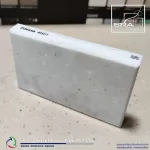
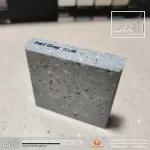
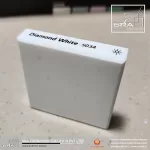
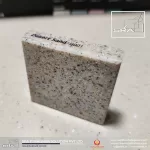
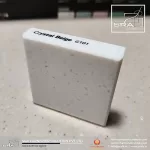
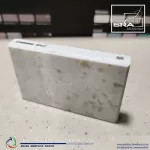
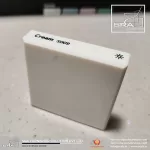
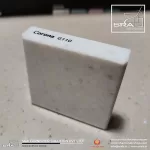
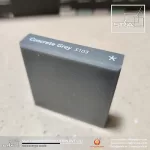
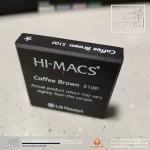
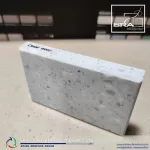
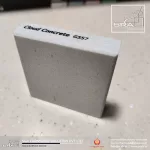
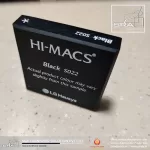
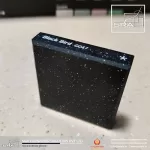
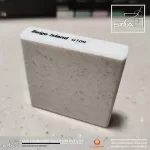
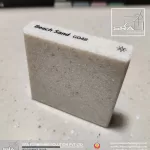
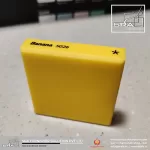
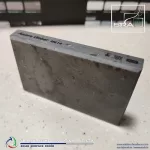
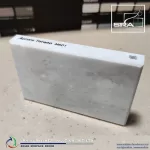
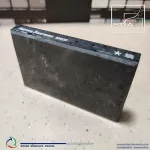
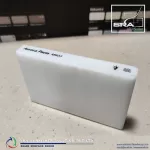
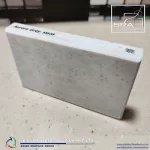
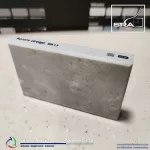
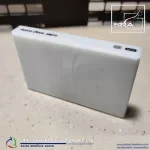
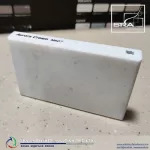
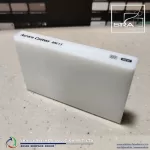
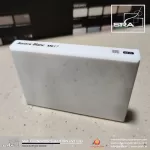
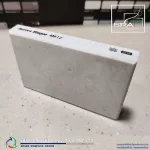
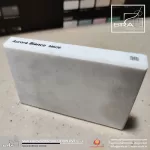
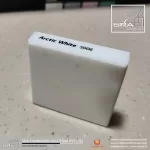
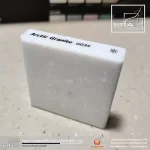
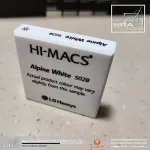
What is LG HI-MACS Acrylic Solid Surface?
What is LG HI-MACS Acrylic Solid Surface? LG HI-MACS Acrylic Solid Surface is a type of solid surface material that is made from acrylic polymer, alumina trihydrate (ATH), and pigments. It is a non-porous material that is resistant to stains, bacteria, and heat. It is also easy to clean and maintain.
LG HI-MACS Acrylic Solid Surface is a revolutionary new material that is quickly becoming the go-to choice for countertops, bathroom vanities, and other interior design applications. It is made from a combination of minerals, acrylic resin, and natural pigments, which gives it a number of outstanding properties.
-
- Durability: HI-MACS is incredibly durable and resistant to scratches, stains, and heat. It can also withstand the weight of heavy objects without cracking or breaking.
-
- Versatile: HI-MACS can be thermoformed into virtually any shape, making it ideal for creating custom countertops, vanities, and other furniture. It can also be used to create seamless joints, which gives it a clean and modern look.
-
- Easy to care for: HI-MACS is easy to clean and maintain. Simply wipe it down with a mild soap and water solution to keep it looking its best.
-
- Environmentally friendly: HI-MACS is made from sustainable materials, and it is recyclable at the end of its life.
If you are looking for a durable, versatile, and easy-to-care-for material for your next interior design project, then LG HI-MACS Acrylic Solid Surface is the perfect choice.
Here are some additional benefits of using LG HI-MACS Acrylic Solid Surface:
-
- Hygienic: HI-MACS is non-porous, which means that it does not harbor bacteria or germs. This makes it a great choice for countertops and other surfaces that come into contact with food.
-
- Fire-resistant: HI-MACS is flame-retardant and will not contribute to the spread of fire.
-
- Biological resistance: HI-MACS is resistant to mold, mildew, and other biological contaminants.
If you are looking for a high-quality, durable, and versatile material for your next interior design project, then LG HI-MACS Acrylic Solid Surface is the perfect choice. It is a beautiful, long-lasting material that will add value to your home.
LG HI-MACS is available in a wide variety of colors and textures, and it can be thermoformed into virtually any shape or size. This makes it a versatile material that can be used for a variety of applications, including countertops, sinks, backsplashes, furniture, and other decorative items.
Here are some of the advantages of using LG HI-MACS Acrylic Solid Surface:
-
- Non-porous: LG HI-MACS is non-porous, which means that it is resistant to stains and bacteria. This makes it a good choice for countertops and other surfaces that are prone to getting dirty.
-
- Heat-resistant: LG HI-MACS is heat-resistant, so it can withstand temperatures up to 300 degrees Fahrenheit. This makes it a good choice for countertops that will be used for cooking or baking.
-
- Easy to clean: LG HI-MACS is easy to clean with soap and water. This makes it a low-maintenance material that is perfect for busy households.
-
- Versatile: LG HI-MACS is available in a wide variety of colors and textures, and it can be thermoformed into virtually any shape or size. This makes it a versatile material that can be used for a variety of applications.
Overall, LG HI-MACS Acrylic Solid Surface is a versatile and durable material that is a good choice for countertops and other surfaces in the home. It is easy to clean and maintain, and it is available in a wide variety of colors and textures. However, it is more expensive than some other countertop materials, and it is not as durable as natural stone.
Here are some of the applications of LG HI-MACS Acrylic Solid Surface:
-
- Countertops: LG HI-MACS is a popular choice for countertops because it is easy to clean and maintain, and it is available in a wide variety of colors and textures.
-
- Sinks: LG HI-MACS sinks are durable and easy to clean, and they come in a variety of shapes and sizes.
-
- Backsplashes: LG HI-MACS backsplashes are a beautiful and functional way to add style to your kitchen or bathroom.
-
- Furniture: LG HI-MACS can be used to create a variety of furniture pieces, including tables, chairs, and cabinets.
-
- Decorative items: LG HI-MACS can be used to create a variety of decorative items, such as shelves, mirrors, and light fixtures.
If you are looking for a versatile and durable material for your countertops, sinks, backsplashes, or other surfaces, then LG HI-MACS Acrylic Solid Surface is a good option. It is easy to clean and maintain, and it is available in a wide variety of colors and textures.
What is LG HI-MACS Acrylic Solid Surface? LG HI-MACS Acrylic Solid Surface IS AN OUTSTANDING SOLID SURFACE MATERIAL THAT CAN BE MOULDED TO ANY SHAPE – FROM BEAUTIFUL WORKTOPS TO STUNNING FACADES.
What is LG HI-MACS Acrylic Solid Surface? LG HI-MACS Acrylic Solid Surface is an outstanding solid surface material. A delicate composition of acrylic, minerals and natural pigments that combine to create a smooth, non-porous, thermoformable and visually seamless surface. The material meets the highest standards for quality in all aspects: material performance, fabrication, functionality and hygiene.
Thanks in a large part to this quality and the outstanding flexibility in fabrication and design, HI-MACS® offers countless advantages over conventional materials. HI-MACS® Natural Acrylic Stone is produced in an ultra-modern manufacturing process that complies with the best quality certification standards.
Quality is in our DNA.
LG HI-MACS® benefits from the high-tech infrastructure and development-experience of LG Group who regularly bring stunning innovations to life. LG guarantees superior quality for all raw materials; the acrylic contained is produced by our own factories, certifying excellence from the source.
Quality is available.
We stock the entire colour and product range in 40 local warehouses in Europe and one huge central European warehouse.
Quality is worldwide support.
Full access to LG after-sales support and fabrication network worldwide.
Quality is an excellent network of highly skilled craftsmen.
Our highly skilled fabrication partners enjoy regular training to provide you with the best possible product. They have access to the best in class training material and support. The most skilled fabricators of HI-MACS® are easy to identify as they are certified members of the HI-MACS® Quality Club. Contact us for your nearest member.
Quality is the longest warranty in the market.
We support our Quality Club Members with a 15 year warranty. The longest warranty in the solid surface market.
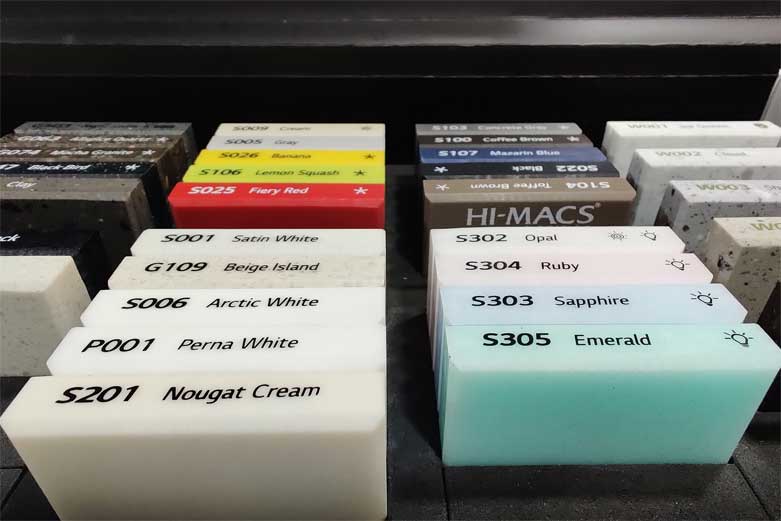
Wide range of choice
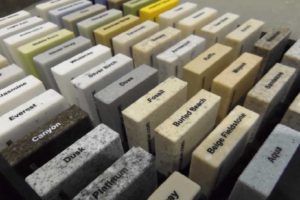
LG Hausys Surfaces offers more than 100 colors of top quality solid surfaces as well as 30 Quartz surfaces
HI-MACS® Classic
Soft or loud, subtle or staggering, HI-MACS® Classic’s shades and particulate patterns will let your space speak in exciting and original way
HI-MACS® Volcanics
Large translucent chips in HI-MACS® Volcanics Solid Surface create dazzling color option, giving your surface breathtaking beauty, clarity, and depth.
Colors & Pattern
Volcanic
-
- GeminiVW01
-
- TamboraVE01
-
- Santa AnaVA01
-
- MerapiVB01
Volcanic Natural
-
- LattetudeVE21
-
- CameroonVN21
-
- ShastaVE26
-
- VesuvioVA23
-
- DominicaVN22
-
- StellaVR21
-
- SantoriniVL21
-
- DoradoVB24
-
- KohalaVN24
Colors have unique qualities. Printed representation of colors may vary from actual samples. Please view actual product prior to purchase. Solid surface darker colors will show ordinary wear and tear more readily than lighter colors or patterns
HI-MACS® Lucent
The translucence of HI-MACS® Lucent allows you to light spaces in ways You’ve only dreamed of. The pastel shades provide a sensuous look when combined with light sources to change the mood of the environment or shade of color. HI-MACS® Lucent lets you play with light in ways you never thought possible.
Colors & Pattern
-
- OpalS302
-
- RubyS304
-
- EmeraldS305
-
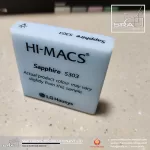
- SapphireS303
Colors have unique qualities. Printed representation of colors may vary from actual samples. Please view actual product prior to purchase. Solid surface darker colors will show ordinary wear and tear more readily than lighter colors or patterns.
HI-MACS® Galaxy
Introducing HI-MACS® Galaxy, the next dimension in soild surface. Out of the world colors are fused with large transparent chips to emphasize today’s new quartz styles while maintaining all of the features and functionality of solid surface.
HI-MACS® Marmo
Introducing HI-MACS® Marmo, a solid surface that embodies the organic look of natural stone, and of the moment. Captivating a combination of veined patterns and translucent chips, solid surface has never looked so natural. Whether elegant or edgy, new design goal are possible with the styles of HI-MACS® Marmo
Colors & Pattern
-
- TorinoM101
-
- BolognaM103
-
- VeniceM102
-
- RomaM104
-
- VeronaM105
-
- TerniM201
-
- LuccaM203
-
- CanossaM202
-
- BergamoM204
-
- ParmaM205
-
- MonzaM206
Colors have unique qualities. Printed representation of colors may vary from actual samples. Please view actual product prior to purchase. Solid surface darker colors will show ordinary wear and tear more readily than lighter colors or patterns.
HI-MACS® Aurora Collection
The Aurora Collection is a new group of
HI-MACS® realizing the soft and mysterious beauty of natural marble pattern inspired by the aurora seen in the polar regions.
Why HI-MACS®?
-
“LG, A Trusted Brand”The LG Brand, one of the world’s most powerful and fastest growing brands, is now receiving praise from customers as a top global brand. We will work together to achieve your highest satisfaction.
-
“Eco-Friendly Products”LG Hausys Surfaces offers 13 colors of Eden-Plus solid surfaces containing up to 41% post-industrial recycled contents.
-
“Wide range of choice”LG Hausys Surfaces offers more than 100 colors of top quality solid surfaces as well as 30 Quartz surfaces.
-
“Design Solution”HI-MACS® provides limitless possibilities for creative design, closely aligned to the demands of the project thanks to its excellent feature of thermoforming.
Fabrication Guide
Tool Introduction
Adhesive
Adhesive Characteristics
Be sure to use an adhesive color selection chart to review the properly coded adhesive for respective HI-MACS® sheet color selected. It is important to “adhere” to the recommendations set forth by HIMACS. This will ensure proper color match and the finished glue lines.
-
- Bulk adhesive cartridges typically provide 1000mm of seaming.
-
- Normal cure time is about 40 minutes in 21 degrees C.
If hotter, your working time is greatly reduced and, if cooler, your working time is greatly enhanced. Consider this as you begin assembly. You do not want to get too far ahead of yourself if it is warm. You will end up with a mess.
- Normal cure time is about 40 minutes in 21 degrees C.
-
- Remember to consider scuff-sanding joints for better bonding using 60 grit sand paper.
-
- Before applying the adhesive, clean all areas being bonded with denatured alcohol and a clean white rag.
Be sure to look for dirt, pencil marks, and oily fingerprints on all bonding surfaces and remove them.
- Before applying the adhesive, clean all areas being bonded with denatured alcohol and a clean white rag.
-
- Assemble the cartridge in the seaming gun with a fresh disposable mixing tip.
After each use, remove and replace this tip.
The adhesive in the tip will set up just as the seams do on your materials.
To ensure the best bond, remember to keep up the maintenance of your mixing tip.
If you are finished gluing for the day, you can leave the tip on and place it in your storage refrigerator.
The next time you use it you only need to change the tip.
- Assemble the cartridge in the seaming gun with a fresh disposable mixing tip.
-
- As you get ready to apply adhesive and begin assembly of your HI-MACS® top, remember to purge the tip.
This is done by squeezing out a bead of approximately the length of the tip. This ensures trapped air has worked itself from the mixing tip and that the catalyst and adhesive have properly mixed and are ready
- As you get ready to apply adhesive and begin assembly of your HI-MACS® top, remember to purge the tip.
-
- Gun Type
- Gun Type
-
- Tube Type
- Tube Type

2010 HI-MACS® Adhesive Color List

Tools for HI-MACS® Fabrication
Particle Board
-
- Generally particle board of 15mm with melamine layered on one side of the board.
-
- However, for quality fabrication and to prevent sheet warping, it is recommended to use at least 18mm particle board with both side melamine layered. This will cause stable quality for shrink and expansion caused by heat and moisture.
-
- If you use one side layered particle board, it is very weak for moisture, this will cause bad fabrication quality.
-
One layered
-
Double layered
Grinder
-
- Grinder is used to eliminate the residue of glue when the glue gets hard.
-
- It is not appropriate to cut HI-MACS®, and only used for sanding the tough surface of the sheets.

Jig Saw
-
- It is used for cutting sheets at installation field.
-
- The height of blades should be 5~10mm higher than the sheet and do not put two sheets together to cut.

Clamp
-
- It is used to hold sheet to sheet while hardening the adhesive between HI-MACS®.
-
- A basic fabrication shop will need 500 to 1000 hand-spring clamps in order to work on multiple projects at one time and provide the installation crew with their requirements. Specifically, you will need one clamp placed every 5cm along the leading edge of the build-up edge perimeter.
-
- You can also use spring clamp for more comfortable work. It is more convenient to use because it has its one pressure power to hold the sheets.

Orbital Sander
-
- The process of fabrication has a great deal to do with sanding.
Good sanding/finishing takes a great deal of skill and time. Quality procedures need to be put in place, and quality training, sanders, and papers must be used.
- The process of fabrication has a great deal to do with sanding.
-
- Orbital sanders are essential for quality gloss finish and sand papers are used numbers from #120 > #240> #320> #400> #600> #1000(very glossy)

Sand Paper
-
- You need to adjust proper sand paper according to its glossy grade.
-
- Generally, Use 3,000~4,000 rpm speed.

Router
-
- A router is a must have piece of equipment for through cuts, profiles and general fabrication. The power and RPM speed minimize chipping and provide precision high quality cuts.

Sliding table saw
-
- When cutting sheets into length and width directions, it offer better result than jig saw and more comfortable.
-
- Easily work with apron and backsplash.

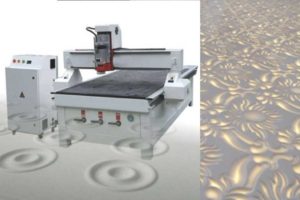
Computer Numerical Control
-
- This machinery processes the materials efficiently and quickly on large jobs.
It offers the consistent ability to manufacture components while maximizing material yields.
- This machinery processes the materials efficiently and quickly on large jobs.
-
- Can work with 3dimensional fabrication like sculpture, art crafts.

V-Grooving Machinery
-
- When making sink counter, it makes groove on the joint and makes it easier for back splash and apron.

Other
-
Hot-Melt
-
Compound
-
Gun Type Cartridge
-
Jig Saw-Blade
-
Router Bite
The list of suggested materials suppliers
| Tools | Source | Model# |
|---|---|---|
| #240 #500 #1000 #2000 |
3M 3M 3M 3M |
5” disk 5” disk 5” disk 5” disk |
| compounding liquid Finesse-It compounding liquid Medium-duty compound |
3M DuPont |
77340 600S |
| Finish liquid Finesse-It finishing liquid Highlighting glaze |
3M DuPont |
13084 3000S |
| Random Orbital Sanders | Porter Cable Bosch Fein Makita |
7336 1370DEVS MSf 636-1 B05000 |
| Polishers Polisher hook and loop pad Compounding pad Polishing pad Use & care liquid |
Porter Cable Bosch Black & Decker Sears 3M 3M 3M 3M DuPont Finall Glaze Hope’s Countertop Polish |
661 1328 6138 (1500-2000 RPM) 5717 5712 5713 |
Sink Mounting
You can either bevel mount or under mount your HI-MACS® sink or vanity to your HI-MACS® countertop or vanity to create a monolithic appearance smooth to the touch and crisp and clean to the appearance.
Mounting Sinks from Dissimilar Materials
The most typical dissimilar sink or vanity will be comprised of Stainless Steel, Porcelain, Cast Iron, Ceramic or Glass. These sinks can be top mount, self rimming or under mount.
When Top Mounting
-
- Cut the opening in the countertop approximately 2.5cm larger in length and width than the sink is to be mounted. Make this cutout with a router only! This opening should then be sanded to remove chatter to a smooth finish.
-
- Apply a 6mm bead of 100% silicone to the bottom edge of the self rimming sink flange and also to the edge of the routed cutout.
-
- Position the sink into the cutout so that the flange rests on the deck. Make certain to install the clips or clamps supplied, but remember not to screw anything directly into or onto the HI-MACS® materials.
Use a wooden block or shim block when necessary.
Your distributor has or will direct you to the approved sources for sink clips that are appropriate to mount into the HI-MACS® sheet materials.
- Position the sink into the cutout so that the flange rests on the deck. Make certain to install the clips or clamps supplied, but remember not to screw anything directly into or onto the HI-MACS® materials.
When Under Mounting Sinks from Dissimilar Materials
-
- Make a template if one is not provided of the required size for the cutout.
-
- Sand and finish the routed edges and chatter to provide a smooth surface.
-
- Invert or flip your HI-MACS® countertop. Make certain your bench is flat and level.
-
- Leave enough room at the back of the countertop for the faucet assembly, edge buildup backsplash, and respective sink flange.
-
- Apply a 6mm bead of 100% silicone to the top of the sink flange and to the bottom of the HI-MACS® counter top at the flange perimeter edge.
-
- Position the sink equally around the cutout and install sink clips or clamps supplied, but remember not to screw anything directly into or onto the HI-MACS® materials.
Use a wooded block or shim block when necessary.
Your distributor has or will direct you to the approved sources for sink clips appropriate to mount into the HI-MACS® sheet materials.
- Position the sink equally around the cutout and install sink clips or clamps supplied, but remember not to screw anything directly into or onto the HI-MACS® materials.
Sinks and Bowls to HI-MACS® Sheet Materials.
-
- A seam mount in solid surfacing is gluing the top of the sink flange with adhesive to the bottom of HI-MACS® sheet materials.
For this reason, all typical bonding steps are performed on an inverted or flipped sheet, thus exposing the bottom of your countertop.
- A seam mount in solid surfacing is gluing the top of the sink flange with adhesive to the bottom of HI-MACS® sheet materials.
-
- Most fabricators will perform all steps in an inverted fashion, with the exception of final trimming with the router and finish sanding.
-
- It may be helpful to make sure you have a work table/bench that is open or wide enough in the center to flip the top into once the sink is installed for final trimming and finishing.
Such a table/bench will provide proper support all around the sink and countertop.
- It may be helpful to make sure you have a work table/bench that is open or wide enough in the center to flip the top into once the sink is installed for final trimming and finishing.
-
- Mark the center location of the bottom of the sheet where the sink will also be centered in the sink base cabinet.
Use an auger to scribe these marks.
- Mark the center location of the bottom of the sheet where the sink will also be centered in the sink base cabinet.
-
- Once you dry fit the bowl into final position, use the same auger to draw an outline around the sink/bowl.
-
- Completely sand and then clean the surface of the sink flange and the area on the bottom of the sheet inside the auger outline that will have adhesive placed on it.
-
- Place the sink/bowl back into position inside your auger outline.
-
- Attach blocks made of wood or scrap HI-MACS® material with hot melt glue against the outside edge of the flange. Once the glue has dried the sink will remain in position.
-
- At this point you can place a bead of adhesive on the flange of the sink or bowl and on the auger outline on the sheet.
-
- Place the bowl inside the positioning blocks and attach clamps or weights to ensure adequate and equal pressures as the adhesive is setting up.
Depending on the bowl, it may be necessary or required to install sink clips or brackets to aid in the sink support.
It can be noted that if you notch the positioning blocks to produce an “L” block, you can create you own support bracket.
- Place the bowl inside the positioning blocks and attach clamps or weights to ensure adequate and equal pressures as the adhesive is setting up.
-
- Once the adhesive is dry, carefully flip the top upright.
Place your router in the center of the bowl and plunge an approximate 2.5cm hole through the sheet.
Make sure you now put a bearing guide on the bit and follow the perimeter of the bowl as a guide.
The bearing will follow it and the excess cutout material will be removed.
- Once the adhesive is dry, carefully flip the top upright.
-
- Change your bit to a finish profile bit with a bearing guide and finish routing the final profile to the deck and bowl.
It can be a smooth transition appearing as a monolithic top and bowl or a small bullnose to provide a transition lip.
- Change your bit to a finish profile bit with a bearing guide and finish routing the final profile to the deck and bowl.
Lavatory Bowl (Under Mount Type)
Step 1
Mark the center of product to install the bowl.

Step 2
Take the bowl and mark its circumference with auger. (Pencil or marker not recommended)

Step 3
Completely clean surface around circumference with denatured alcohol.

Step 4
Attach blocks as shown with quick-drying or hot melt adhesive in order to prevent the bowl from moving.

Step 5
Lightly sand the flange part of bowl with sand paper.

Step 6
Apply denatured alcohol and clean the flange.

Step 7
Plunge a hole near the center of where the bowl is to be mounted, using router.

Step 8
Apply the adhesive to the bowl flange.

Step 9
Place and attach the bowl as shown.

Step 10
Attach with clamps until the adhesive has hardened.

Step 11
Remove clamps after adhesive has hardened. Turn assembly over and route sink hole as shown.

Step 12

Thermoforming
CAUTION / The Volcanics Series is Not Thermoformable!
-
- Template to the shape required using plywood.
-
- Since materials other than plywood have inappropriate cooling times, it is recommended that only plywood be used.
-
- HI-MACS® can be formed to tight radius by means of heating.
The oven must heat the entire sheet for successful thermoforming operations.
- HI-MACS® can be formed to tight radius by means of heating.
-
- The sheets need to be heated to a temperature of 160-180℃, but should never exceed 200℃.
-
- Remove the protective film prior to heating.
-
- The minimum forming radius of 12 mm HI-MACS® is 45 mm for Solids, Pearls and Sands and a minimum forming radius by 12 mm HI-MACS® Quartz and Granite is 100 mm till 120 mm.
But always be aware: the darker the colour, the smaller the radius will be, the more whitening there may be.
- The minimum forming radius of 12 mm HI-MACS® is 45 mm for Solids, Pearls and Sands and a minimum forming radius by 12 mm HI-MACS® Quartz and Granite is 100 mm till 120 mm.
-
- The sheets should normally be heated for 15 to 30 minutes, depending on batch (manufacture date), heating temperature and pre-heated oven. Rebating the reverse side in the area to be formed can result in shorter heating times and smaller radius.
-
- Once heated to the required temperature remove workpiece with heat resistance gloves from the oven and place directly into a mould. Male and female mould are required. Allow heated material to shrink in the mould.
-
- Leave the sheet in the mould until the sheet has cooled down, ca. 60℃ at least, (typically 20-40 minutes, depending on the material of the mold). Always wear heat-protection gloves for this operation.
-
- Never attempt any shock cooling as this can cause stress to the material.
-
- Attempting to bend HI-MACS® at lower temperatures or shortening the heating cycles will often result in “whitening” or cracking of the edge.
-
- Normal sanding and finishing of the formed edge can be carried out once the sheet is fully rigid.
Thermoforming Process per Thickness of Product
| Thickness of Product(mm) | 6 | 12 |
|---|---|---|
| Oven temperature(℃) | 160~190 | 160~190 |
| Heating Time(Minute) | 20 | 40 |
| Minimum Curve Radius(mm) | R50 | R100 |
Cooling
Never take out the product from the template before the temperature reaches 80℃.
The shape of product is maintained at temperatures below 80℃, even if the product is not supported by the template.
| Thickness of Product(mm) | 6 | 12 |
|---|---|---|
| Cooling Time(Minute) | 10~20 | 20~40 |
Note
-
- 1. Peel off the protective sheet, which is attached to the surface of product.
-
- 2. Be careful that the oven temperature does not exceed 200℃.
-
- 3. Heat 10~20 minutes, or more if you need the product with minimum curve R.
-
- 4. Please note with caution hat a whitening effect can be generated on the surface of the product if the temperature is too high or the heating is prolonged.
Process of thermoforming

Sanding
Finish Considerations
-
- HI-MACS® sheet materials are factory sanded prior to peel coat application.
The result of this superior quality factory finish offer fabricators less final sanding time in the shop or on the jobsite.
- HI-MACS® sheet materials are factory sanded prior to peel coat application.
-
- Sanding is a very important part of the fabrication process.
-
- Be very sure to sell a finish that is right for the color and lifestyle of the customer.
-
- Do not oversell the performance of a specific finish, especially in a darker color selection and in a satin or gloss finish selection.
-
- Be forthright, in clearly expressing the performance of a finish option.
-
- The sanding and finishing process can also be the most time consuming and frustrating experience to the fabricator in the process of fabrication.
-
- HI-MACS® would like to simplify the process as you take your countertop finish from a standard matte to satin to high gloss finish.
-
- Additionally, it can be confusing to the fabricator because of the multitude of sanding equipment, systems and sand paper companies available to the fabricator.
-
- As you decide the best equipment and sanding papers to incorporate into your fabrication process, remember to purchase good quality sanding equipment and sandpapers.
Sanding Process
-
- The final process of manufacture of all HI-MACS® elements is to sand (and/or to polish for special applications).
-
- Under normal circumstances, begin by sanding the entire element with 120 grit paper.
In instances where there has been no prior fabrication of the sheet, it is possible to start with 280 or 320 grit.
- Under normal circumstances, begin by sanding the entire element with 120 grit paper.
-
- Always use dust extraction systems at all times when sanding, this will help pick up loose particles of grit and prevent unwanted scratches.
-
- Build up to finer and finer levels of grit size, taking care to clean down between each change with a damp cloth.
Finish a 320 grit paper and than followed by Superpad S/G 1200 from Jost to reach a recommended semi-gloss level.
- Build up to finer and finer levels of grit size, taking care to clean down between each change with a damp cloth.
-
- To improve the gloss level of the surface use 1200/1500/1800 wet or dry, Scotch Brite pads, or polishing pastes available from 3M or other manufacturers.
High-gloss finish level is very sensitive in maintenance and not recommended for normal use, but for art subjects acceptable.
High-gloss finish Level is NOT covered under the 10-year limited installed warranty program.
- To improve the gloss level of the surface use 1200/1500/1800 wet or dry, Scotch Brite pads, or polishing pastes available from 3M or other manufacturers.
-
- Keep the sander moving slowly in circles at all times, first in an East-West direction then North-South.
Insure to use proper equipment, like a random orbital sander with a flat pad.
For straight surfaces use a hard pad always.
Soft or super-soft pads are recommended for curved surfaces.
- Keep the sander moving slowly in circles at all times, first in an East-West direction then North-South.
-
- Never concentrate on one specific area, particularly near seam, as this can lead to dipping.
-
- After each sanding step, wipe off dust, then start with the next step.
-
- Be aware that some dark colours need more careful sanding than some other lighter colours.
Matte Finish
-
- To achieve a matte finish, you can either use a grit or a micron system.
Remember the numbering system or grades of papers between grit and micron systems are opposite to one another.
- To achieve a matte finish, you can either use a grit or a micron system.
-
- First, use a 120 Grit or 100 micron abrasive.
Once this step has been completed, remember to clean the top and switch papers to a 180 or 220 Grit or 60 Micron paper.
- First, use a 120 Grit or 100 micron abrasive.
-
- Finally, clean the top once again and surface the top with a #7447 Scotch-Brite pad.
-
- If you are working with a dark or black color, you may have to add an additional third step in sanding.
This will require a 320-400 Grit or 30 micron paper.
If this is done, you will then want to clean the top and then surface the top with a #7448 Ultra Fine Scotchbrite pad.
- If you are working with a dark or black color, you may have to add an additional third step in sanding.
Satin Finish
-
- If you wish to achieve a satin finish follow the same steps expressed to achieve a Matte Finish on a dark color.
Use a 120 Grit/IOO Micron, then switch to a 180-220 Grit/60 Micron.
Remember to clean the top between steps.
- If you wish to achieve a satin finish follow the same steps expressed to achieve a Matte Finish on a dark color.
-
- You will want sand the top using 320-400 Grit/30 Micron paper. Clean the top.
-
- Finally, you will surface the top with a #7448 Ultra Fine Scotch-Brite pad.
Clean the top once again and examine the final finish.
- Finally, you will surface the top with a #7448 Ultra Fine Scotch-Brite pad.
Gloss Finish
-
- Follow the steps to the Satin Finish specification, but do not use the #7448 pad yet.
As you reach the 320-400 Grit/30 Micron step, you will need to add a few additional steps.
- Follow the steps to the Satin Finish specification, but do not use the #7448 pad yet.
-
- Sand the top using 600-900 Grit/15 Micron paper. Thoroughly clean the top.
Remember to check the loading of your paper during the process and replace it frequently as necessary to maintain a consistent finish.
- Sand the top using 600-900 Grit/15 Micron paper. Thoroughly clean the top.
-
- Make sure to remove excess adhesives with a surfacing router equipped with a system of skis.
Avoid use of a belt sander as it generates a great deal of heat and can fail a seam. Furthermore, the belt sanding equipment is very aggressive and can remove material quickly.
That being said you can create more problems for your countertop fabrication if more material is removed than is supposed to be. You want to maintain control in the sanding process.
It is the final step of showcasing your work.
- Make sure to remove excess adhesives with a surfacing router equipped with a system of skis.
-
- An important step in the process of sanding is to thoroughly clean the top between steps or grit changes.
You can do so with a spray bottle of water or preferably denatured alcohol and a clean white rag.
Cleaning off sanding dust between steps allow for a more consistent and high quality finish.
- An important step in the process of sanding is to thoroughly clean the top between steps or grit changes.
-
- Apply equal pressure and overlapping coverage in both directions of the top.
For example, left to right and front to back. Complete one direction before starting the other.
- Apply equal pressure and overlapping coverage in both directions of the top.
-
- Change or clean your sandpaper as you sand as it will get loaded and become less efficient.
As you get to a more detailed finish the sandpapers will load more quickly.
If care is not taken to keep the sandpaper loading to a minimum, it will impair your ability to achieve a high quality, consistent finish. In a gloss situation, you may never achieve it.
- Change or clean your sandpaper as you sand as it will get loaded and become less efficient.
Care & Maintenance
-
- From renegade paring knives to busy lifestyles — LG Hausys Surfaces Material is made to withstand life. In fact, no special cleaning products are needed to keep your countertop looking great day in, day out. But like all fine materials, damage may occur if your countertop is mistreated. To help prevent this from happening, we’ve outlined a few simple ways to be sure your countertop maintains its original elegance and beauty for years to come.
Normal cleaning only requires a damp cloth and a mild cleanser. If you’ve chosen a matte finish, you can use an abrasive cleaner like Ajax or Comet. If you do use an abrasive cleaner, we recommend periodically cleaning the entire surface in a circular motion to maintain uniformity. Avoid using strong acidic cleansers (like those designed for drains, toilets or ovens). Some of them can cause whitening, which can be difficult to remove.
- From renegade paring knives to busy lifestyles — LG Hausys Surfaces Material is made to withstand life. In fact, no special cleaning products are needed to keep your countertop looking great day in, day out. But like all fine materials, damage may occur if your countertop is mistreated. To help prevent this from happening, we’ve outlined a few simple ways to be sure your countertop maintains its original elegance and beauty for years to come.
-
- A few common sense precautions include not placing pans directly from the burner or oven on your countertops. Although HI-MACS® can withstand temperatures of up to 225 degrees, prolonged or extreme heat can cause yellowing.
-
- Troublesome spills and stains, like food dye, tea and fruit drinks can be removed with full strength bleach followed by a general cleaner flushed with water. Be sure and not let the bleach remain on the surface for more than five minutes. If a lit cigarette should come in contact with your countertop, a nicotine stain or a scorch mark can occur. Simply use an abrasive cleaner or buff in a circular motion with a Scotch-Brite® pad to remove.

 “LG, A Trusted Brand”The LG Brand, one of the world’s most powerful and fastest growing brands, is now receiving praise from customers as a top global brand. We will work together to achieve your highest satisfaction.
 “Eco-Friendly Products”LG Hausys Surfaces offers 13 colors of Eden-Plus solid surfaces containing up to 41% post-industrial recycled contents.
 “Wide range of choice”LG Hausys Surfaces offers more than 100 colors of top quality solid surfaces as well as 30 Quartz surfaces.
 “Design Solution”HI-MACS® provides limitless possibilities for creative design, closely aligned to the demands of the project thanks to its excellent feature of thermoforming.

 One layered
 Double layered
 Hot-Melt
 Compound
 Gun Type Cartridge
 Jig Saw-Blade
 Router Bite


